
Harriet Tubman Drawing: Easy Step-by-Step Guide
There’s something powerful about turning history into art. When you sit down to create a Harriet Tubman portrait, you’re not just drawing a face—you’re capturing courage, resilience, and one of the most important stories in American history.
- Harriet Tubman Drawing: Easy Step-by-Step Guide
- Why Harriet Tubman Is a Powerful Drawing Subject
- Materials You Need for Harriet Tubman Drawing
- Understanding the Structure Before You Draw
- Step-by-Step Harriet Tubman Drawing Guide
- Step 1: Basic Outline
- Step 2: Position the Facial Features
- Step 3: Shape the Eyes and Expression
- Step 4: Nose and Mouth Definition
- Step 5: Hair and Head Covering
- Step 6: Refine Facial Structure
- Step 7: Shading and Depth
- Step 8: Final Details and Texture
- Common Mistakes to Avoid
- Tips for a Better Harriet Tubman Drawing
- Artistic Meaning Behind the Drawing
- Simple Version for Beginners
- Advanced Drawing Tips
- Table: Drawing Breakdown Overview
- Why Practice Matters
- Frequently Asked Questions
- Final Thoughts on Harriet Tubman Drawing
A Harriet Tubman Drawing is more than a creative exercise. It’s a tribute. And the best part? You don’t need to be a professional artist to do it well. With a bit of patience and the right approach, anyone can create a meaningful sketch.
In this guide, we’ll walk through everything step by step in a simple, natural way so you can confidently complete your own Harriet Tubman Drawing.
Why Harriet Tubman Is a Powerful Drawing Subject
Before jumping into the pencil work, it helps to understand why Harriet Tubman Drawing is so meaningful.
Harriet Tubman was a symbol of freedom, bravery, and leadership. She risked her life repeatedly to guide others to safety through the Underground Railroad.
What Makes Her Portrait Special
- Strong emotional expression
- Historical significance
- Recognizable facial structure in portraits
- Symbol of courage and resistance
Because of this, a Harriet Tubman Drawing carries emotional weight beyond just art.
Materials You Need for Harriet Tubman Drawing
You don’t need expensive tools. Simple materials are enough.
Basic Drawing Supplies
- Graphite pencils (HB, 2B, 4B)
- Sketch paper or drawing pad
- Eraser (kneaded or regular)
- Sharpener
- Blending stump or tissue
Optional Tools
- Charcoal pencils
- Fine liners
- Digital drawing tablet
Even with minimal tools, a strong Harriet Tubman Drawing is completely possible.
Understanding the Structure Before You Draw
A common mistake beginners make is rushing into details. Instead, focus on structure first.
Key Facial Features to Observe
- Oval face shape
- Deep-set eyes
- Strong cheekbones
- Calm but firm expression
- Head coverings in historical portraits
Understanding these helps improve your Harriet Tubman Drawing accuracy.
Step-by-Step Harriet Tubman Drawing Guide
Now let’s break the process down in a simple, natural way.
Step 1: Basic Outline
Start light. Don’t press hard.
What to do:
- Draw an oval for the head
- Add a vertical guideline down the center
- Add a horizontal line for eye placement
This step builds the foundation of your Harriet Tubman Drawing.
Step 2: Position the Facial Features
Now begin placing features carefully.
Guidelines:
- Eyes on the horizontal line
- Nose centered below eyes
- Mouth slightly lower, relaxed position
- Chin gently rounded
At this stage, your Harriet Tubman Drawing starts taking shape.
Step 3: Shape the Eyes and Expression
Her eyes are one of the most important parts.
Focus on:
- Calm but determined look
- Slight depth under the eyes
- Natural eyelids
- Balanced symmetry
This is where your Harriet Tubman Drawing begins to feel alive.
Step 4: Nose and Mouth Definition
Keep it subtle and natural.
Tips:
- Soft bridge of the nose
- Slight nostril definition
- Gentle mouth line
- Avoid over-darkening early on
A good Harriet Tubman Drawing always balances detail and simplicity.
Step 5: Hair and Head Covering
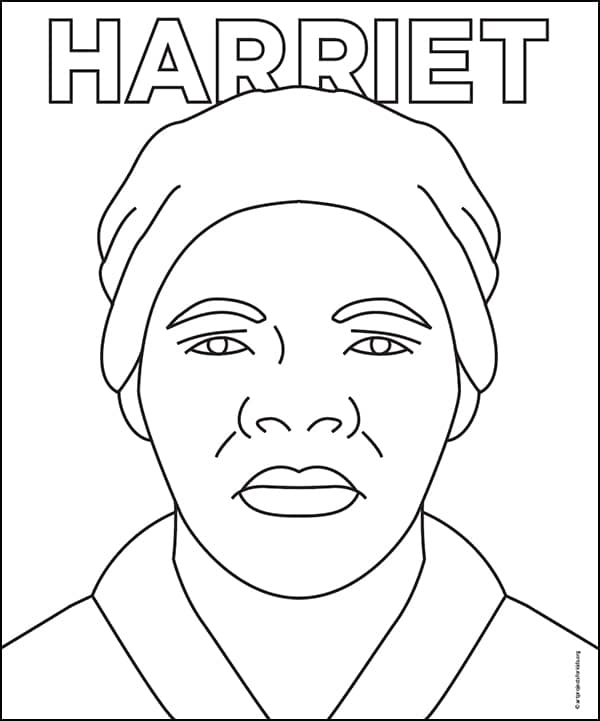
Many portraits of Harriet Tubman include a headscarf.
How to draw it:
- Outline the scarf shape first
- Add folds gradually
- Follow natural fabric flow
- Keep shading soft and layered
This part adds identity to your Harriet Tubman Drawing.
Step 6: Refine Facial Structure
Now go back and refine details.
What to improve:
- Jawline definition
- Cheekbone shading
- Eye contrast
- Nose structure
At this stage, your Harriet Tubman Drawing becomes more realistic.
Step 7: Shading and Depth
Shading brings life to your drawing.
Techniques:
- Use light strokes first
- Build layers gradually
- Focus on light source direction
- Add contrast under cheekbones and chin
Proper shading elevates your Harriet Tubman Drawing significantly.
Step 8: Final Details and Texture
Now refine everything.
Add:
- Skin texture hints
- Fabric folds in clothing
- Eyebrow definition
- Final shadow adjustments
This completes your Harriet Tubman Drawing.
Common Mistakes to Avoid
Even experienced beginners make errors.
Watch out for:
- Over-dark outlines too early
- Ignoring facial proportions
- Rushing shading steps
- Skipping structure guidelines
Avoiding these improves your Harriet Tubman Drawing instantly.
Tips for a Better Harriet Tubman Drawing
Here are practical suggestions to improve your result.
Helpful Tips
- Practice light sketching first
- Use reference images carefully
- Work slowly and patiently
- Step back to check proportions
- Don’t overwork small details early
These habits make your Harriet Tubman Drawing more professional.
Artistic Meaning Behind the Drawing
A Harriet Tubman Drawing is not just technical—it’s symbolic.
What it represents:
- Freedom and courage
- Resistance against injustice
- Strength in adversity
- Historical remembrance
That’s why many artists choose Harriet Tubman Drawing as a meaningful subject.
Simple Version for Beginners
If you’re just starting, simplify your approach.
Beginner Steps:
- Basic oval face
- Simple eyes and nose
- Light shading only
- Minimal detail in clothing
Even a simple Harriet Tubman Drawing can be powerful.
Advanced Drawing Tips
If you want to go further, try this:
Advanced Techniques:
- Cross-hatching for texture
- Realistic light contrast
- Detailed facial anatomy study
- Emotional expression focus
This improves your Harriet Tubman Drawing to a professional level.
Table: Drawing Breakdown Overview
| Step | Focus Area | Difficulty |
|---|---|---|
| 1 | Basic outline | Easy |
| 2 | Facial placement | Easy |
| 3 | Eyes & expression | Medium |
| 4 | Nose & mouth | Medium |
| 5 | Hair & scarf | Medium |
| 6 | Refining structure | Medium |
| 7 | Shading | Advanced |
| 8 | Final details | Advanced |
Why Practice Matters
Every Harriet Tubman Drawing improves with practice.
You may not get perfect results the first time—and that’s completely normal. Art is a process, not a race.
Benefits of Repetition
- Better proportions
- Smoother shading
- Stronger confidence
- Improved creativity
Frequently Asked Questions
Is Harriet Tubman Drawing difficult?
Not at all. With step-by-step practice, it becomes manageable.
What style is best?
Pencil sketching is best for beginners.
Can kids try Harriet Tubman Drawing?
Yes, simplified versions are great for learning.
Do I need shading skills?
Basic shading is enough to start.
Final Thoughts on Harriet Tubman Drawing
A Harriet Tubman Drawing is more than just a sketch—it’s a way of connecting with history through art.
When you draw her face, you’re not only practicing technique, but also reflecting on courage, resilience, and freedom.
And the best part? You don’t need to be perfect. You just need to start.
So pick up your pencil, take your time, and let your Harriet Tubman Drawing tell a story that words alone cannot express.
If this guide helped you, share your experience or try creating your own version—every drawing adds a new perspective to her powerful legacy.